
Trying to play bartender at home but it’s giving more chaos than classy? I get it! One too strong pour, one sad squeeze of lime and suddenly it’s less cocktail hour and more what did I just make?
But here’s the good news… you don’t need to drop cash on a full bar setup or channel your inner Tom Cruise in the movie Cocktail to make amazing drinks. You just need the right tools and a tiny bit of common sense.
Think of it like making pancakes. You wouldn’t eyeball the flour or mix everything with a spoon you found in the junk drawer, right? Same goes for drinks. The tools don’t have to be fancy but they do have to work.
So let’s break down the only mixology tools you actually need to not mess this up… and how to use them without turning your kitchen into a sticky disaster.
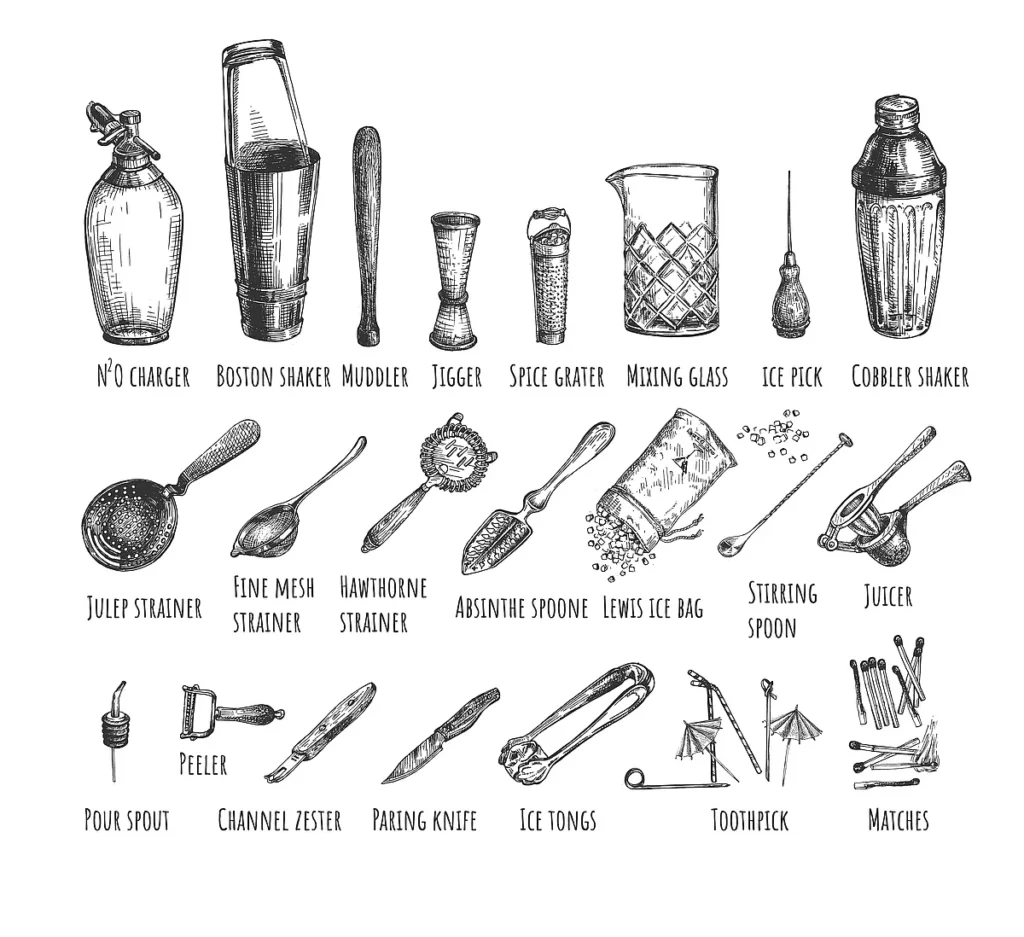
The Must-Have Cocktail Mixology Tools & How to Use Them
You ever watch a bartender shake up a drink like it’s no big deal and think… how do they make it look so easy? Truth is, it’s not just skill. It’s the gear.
Good tools equal half the job done. Or like they say in the Netherlands… ‘goed gereedschap is het halve werk’.
Here’s what you actually need to mix drinks that don’t taste like sad juice or pure vodka. Plus how to use each one without needing a degree in bartending. Keep it simple, keep it fun.
1. Shakers (Boston vs. Cobbler)
Your shaker is the VIP. It chills, blends, and just makes the whole thing feel official. There are two main types:
- Boston Shaker: Two stainless steel tins (or one metal, one glass) that fit together. Pros: Faster, holds more liquid. Cons: Takes practice to seal and open. You use your Boston shaker together with a Hawthorne Strainer to strain out the ice.
- Cobbler Shaker: Has a built-in strainer and cap. Easier for beginners but can sometimes gets stuck and annoying.
How to use: Toss in your ingredients, add ice, seal tight and shake hard for like 12 to 15 seconds. Stop when the metal gets frosty cold. Then strain it out.


2. Jigger
A jigger keeps your pour precise, because free-pouring = accidentally too strong or too weak drinks. Most have two sides: 1 oz (30ml) and 2 oz (60ml), with smaller markings inside.
How to use: Hold it at eye level, fill to the rim, pour it into your shaker or glass. Easy.

Buy Jiggers on Amazon!
3. Muddler
A muddler is what brings out the fresh flavors in cocktails like Mojitos and Old Fashioneds. But there’s a right and wrong way to use it.
How to use: Gently press (don’t mash!) herbs, sugar or fruit in the bottom of a glass… just enough to release the oils or juice.

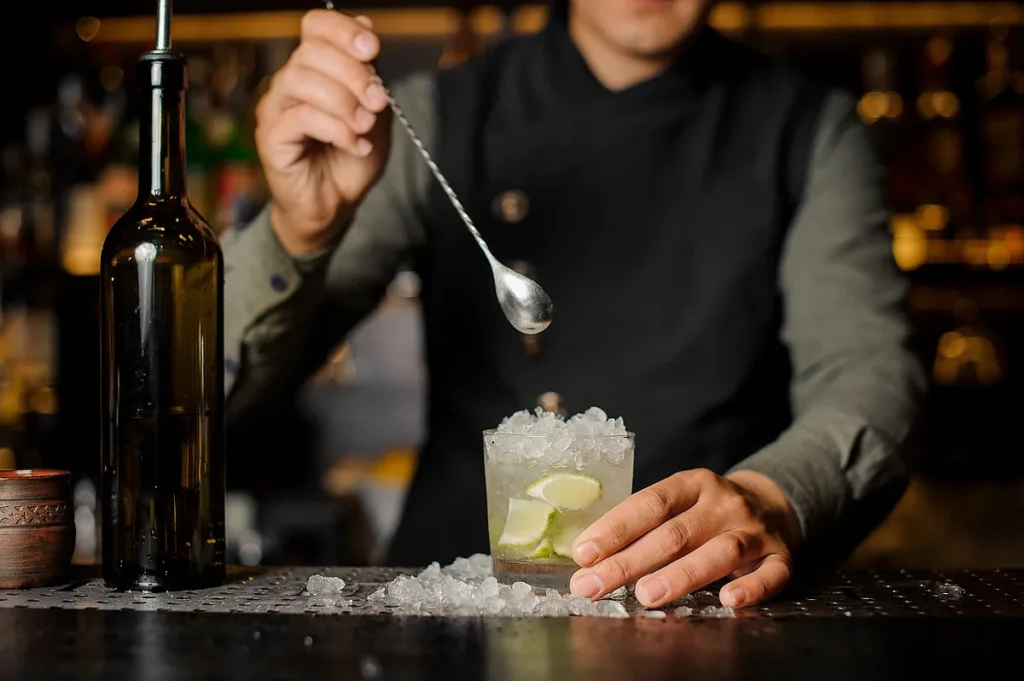
4. Bar Spoon
Looks fancy, but it’s not just for show. The long handle helps stir cocktails smoothly without over-diluting.
How to use: Place the spoon against the inside of the glass and stir in a circular motion, not too fast, not too slow. This method keeps the drink crystal clear instead of cloudy.
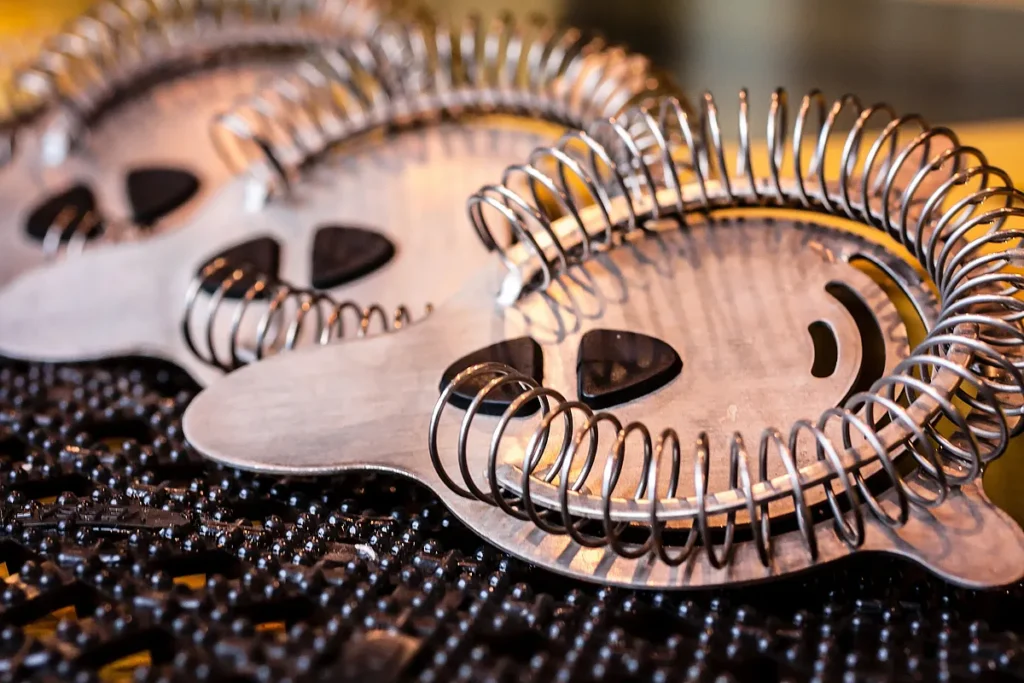
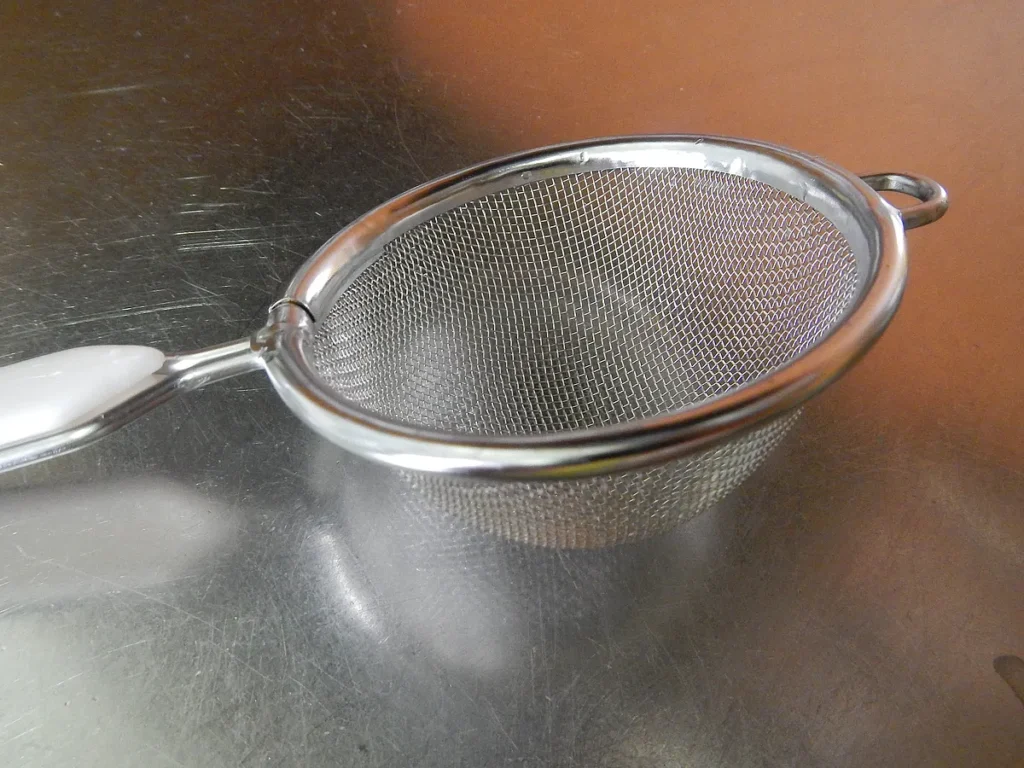
5. Strainer (Hawthorne vs. Fine Mesh)
No one wants a mouthful of ice shards or fruit pulp. That’s where strainers come in.
- Hawthorne Strainer: The one with the spring coil. Goes on your shaker to catch the ice.
- Fine Mesh Strainer: Catches tiny pulp, herbs, whatever. Use this one if you’re going for a super clean pour.
How to use: Hold the strainer over your glass and pour, if using a mesh strainer, double strain by holding it above your Hawthorne strainer.
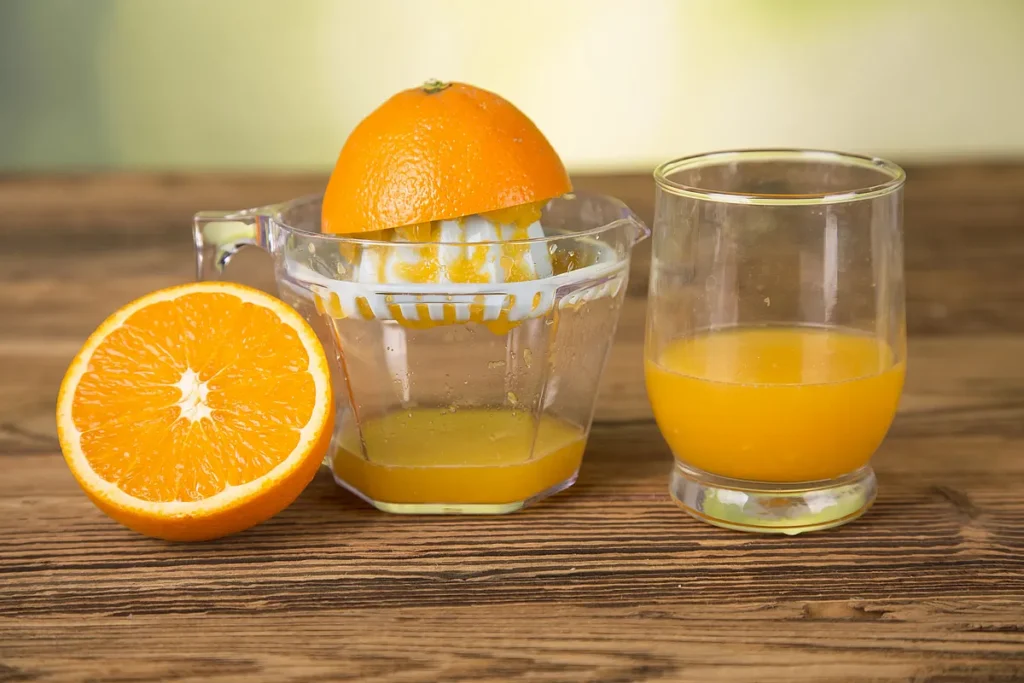
6. Citrus Juicer & Peeler
Store bought juice is fine… if you want your drink to taste flat. Fresh juice makes all the difference. And a good peel makes it look next level.
There are of course many types of juicer, from manual ones like a reamer to electric ones. Use whichever suits your bar, and choose one that is easy to clean.
How to use: Cut your citrus in half, place it in the juicer, and press firmly. For garnishes, glide the peeler smoothly around the fruit, avoiding the bitter white pith.
These tools are the foundation of any great home bar.
Other Basic Mixology Equipment You will need
Obviously there are other basic items you will need to deal with your ingredients.
Let’s talk about which ones you actually need, and which ones you can skip.
1. Ice cube maker
Obviously you will need to make your own ice cubes somehow if you do not get them out of your fridge.
We make them in the freezer in ice cube trays, but maybe if you are making a lot of cocktails you will need your own ice cube maker.
2. Ice tongs
Obviously some simple ice tongs are great to avoid picking up the ice with your hands, for sanitary reasons. An alternative is to use some disposable food gloves if you prefer.
3. Bottle opener
You will need to open bottles of wine and maybe remove bottle tops. We would suggest a professional waiter corkscrew, which can do both.
4. Paring Knife
To slice your lime or lemons you will need a sharp paring knife. It should be able to easily cut through citrus and other types of fruit.
5. Chopping block
A chopping block made of bamboo or wood is another useful item you will need. We prefer the bamboo ones as they seem to damage less easily.
6. Grater / Zester
A grater or zester is another useful tool you will need.
7. Pouring spout
You are likely to need some pouring spouts to make life easier and quicker for pouring syrups or bitters or alcohol from your ingredient bottles.
Tools You Think You Need (But Don’t Really)
Walk into any home goods store, and you’ll see a wall of bar tools, most of which you’ll never actually use.
Let’s save you some money (and drawer space) by breaking down the ones you can skip and their easy swaps.
1. Cocktail Smoking Gun
Sure, smoked cocktails look cool, but unless you’re making them regularly, this gadget is more of a party trick than a necessity. Want a smoky flavor without the extra gear? Use a smoky whiskey or mezcal instead.
Alternative: A torch and a cinnamon stick: light the stick, blow it out and capture the smoke under your glass before pouring your drink.
2. Ice Sphere Mold
Large ice spheres melt slower and look sleek, but they take up a ton of freezer space. If you don’t want to commit, try a silicone tray for big cubes instead.
Alternative: Freeze water in a muffin tin or small food storage containers for chunkier ice that lasts longer in drinks.
3. Electric Cocktail Mixer
Unless you’re making hundreds of drinks a night, your arms can handle the shaking and stirring.
Alternative: Stick to a classic shaker and bar spoon—it’s part of the fun.
However, having said that, you may wish to own a Nutribullet as these things are great for smoothies and will do a great mix job if you need to.
4. Fancy Garnish Tweezers
Some high-end bars use them, but at home? Just use your hands or regular kitchen tongs.
Alternative: A small pair of kitchen tweezers (or honestly, your fingers) work just as well.
Bottom line… skip the gimmicks. A good drink comes from balance and taste, not some overpriced gadget you use once then forget about.
Now that we’ve got your toolkit sorted, let’s match them to the cocktails you’ll be making.
Quick Guide: Matching Tools to Cocktails
Now that you’ve got your setup, let’s talk what goes with what. Every cocktail needs its own method… some need shaking, some need stirring and some just need a little smash of mint.
Here’s a cheat sheet so you don’t stand there wondering which tool to grab.
1. Shaken Cocktails (Use: Shaker + Strainer + Jigger)
Shaking mixes stuff that usually doesn’t blend well like citrus or egg whites. It also chills fast and makes it feel fancy.
Perfect for:
- Margarita: Tequila, lime juice, orange liqueur
- Daiquiri: Rum, lime juice, simple syrup
- Whiskey Sour: Whiskey, lemon juice, simple syrup, egg white

2. Stirred Cocktails (Use: Mixing Glass + Bar Spoon + Strainer)
Stirring keeps things smooth and clear. No bubbles (aeration). You want this when your drink is mostly liquor.
Perfect for:
- Old Fashioned: Bourbon, sugar, bitters
- Negroni: Gin, Campari, sweet vermouth
- Manhattan: Rye whiskey, sweet vermouth, bitters
3. Muddled Cocktails (Use: Muddler + Jigger + Strainer)
Muddling releases essential oils and fresh flavors from herbs and fruits.
Perfect for:
- Mojito – Rum, lime, mint, sugar
- Caipirinha – Cachaça, lime, sugar
- Mint Julep – Bourbon, mint, sugar

Double-Strained Cocktails (Use: Shaker + Hawthorne Strainer + Fine Mesh Strainer)
For cocktails with fresh fruit, herbs or egg whites, double straining removes tiny bits for a silky finish.
Perfect for:
- Espresso Martini: Vodka, coffee liqueur, espresso
- Clover Club: Gin, raspberry syrup, lemon juice, egg white
- Whiskey Sour (with egg white): Whiskey, lemon, sugar, egg white

This quick guide makes it easy to match your tools to the right cocktail.
Pro tips for better drinks at home
Now that your tool game is strong, let’s make sure your drinks actually taste good. These are the little things that make a big difference… and most people forget them.
1. Shake Hard, Not Long
Shaking chills and aerates, but too much shaking = over-diluted drinks. Aim for 12–15 seconds or until the shaker feels ice-cold and frosty.
Pro tip: Use large, solid ice cubes instead of small ones to slow down dilution.
2. Stir With Purpose
Stirring isn’t just swirling it around. You’re blending it smooth and keeping it cold without making it cloudy. Use a smooth, circular motion and stir for about 30 seconds for the perfect chill without over-dilution.
Pro tip: Hold the spoon between your fingers and guide it around the glass, not through the liquid.

3. Use Fresh Ingredients (It Matters)
Bottled lime juice? Pre-made sour mix? Don’t do it. Fresh citrus, real syrups and quality liquor make all the difference.
Pro tip: Roll citrus on the counter before juicing, it releases more juice with less effort.
4. Ice Isn’t Just Ice
Ice affects the temperature, dilution, and texture of your drink. Cheap freezer ice = fast-melting and watery cocktails. Use filtered water and large cubes whenever possible.
Pro tip: Make clear ice by boiling water before freezing, it removes air bubbles and impurities.
5. Taste As You Go
Pros always taste test. You should too. Don’t wait till your guest takes a sip to find out it’s too sour.
Pro tip: If a drink is too sweet, add a few drops of citrus. Too sour? A splash more syrup or a pinch of salt balances it out.

With these pro tips, your drinks will be smoother, better balanced and bar-quality every time. Now, let’s bring it all together and set the vibe for your home bar.
Bring the Vibe to Your Home Bar
Great cocktails aren’t just about what’s in the glass—they’re about the moment, the company, and the vibe. Whether you’re hosting friends or just winding down solo, here’s how to level up your home bar experience.
1. Set the Mood
Good drinks deserve good ambiance. Lighting and music are everything. Harsh overhead lights kill the mood fast.
Pro tip: Keep a small lamp or fairy lights near your bar area, it makes everything feel a little more intentional.
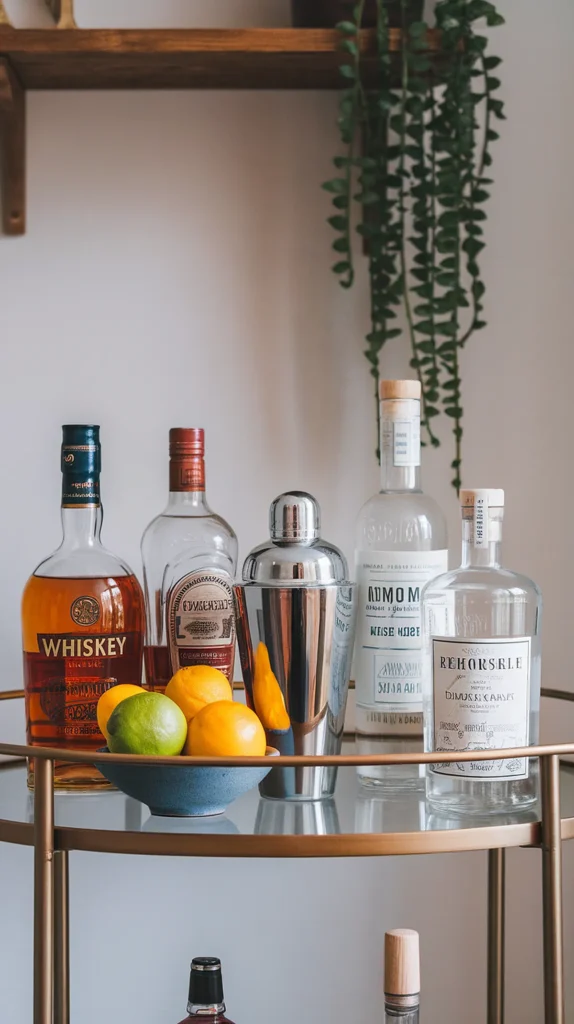
2. Stock Smart, Not Excessive
You don’t need every spirit and liqueur, just the essentials for your go-to drinks. Start with a good whiskey, tequila, gin, vodka and a few mixers then build from there.
Pro tip: Have one “signature” house cocktail that you can always mak, something simple but impressive.
3. Glassware Matters
No need to go full bartender mode but the right glass just makes it hit better. Coupes for elegant cocktails, rocks glasses for classics and highballs for refreshing drinks.
Pro tip: Chill your glasses in the freezer for 10 minutes before serving—it keeps drinks colder, longer.
A great cocktail is even better when shared. Invite a friend over, teach them how to make a simple drink, and make a night out of it.
Pro tip: Keep a cocktail recipe notebook with your best creations, it’s like a playlist, but for drinks.
Cocktail Mixology Tools That You Actually Need
If you are starting from scratch, you can buy a full cocktail set here on Amazon. They also make a great gift for anyone over drinking age.
Now you’ve got the tools, the techniques, and the vibe, all that’s left is to mix, sip and enjoy. The best cocktails aren’t just well-made; they’re about the stories, the laughs and the moments that come with them.
What’s your go-to cocktail? Send us a message to let us know!